
Construction Estimating Checklist Guide for General Contractors | R. Construction Solutions
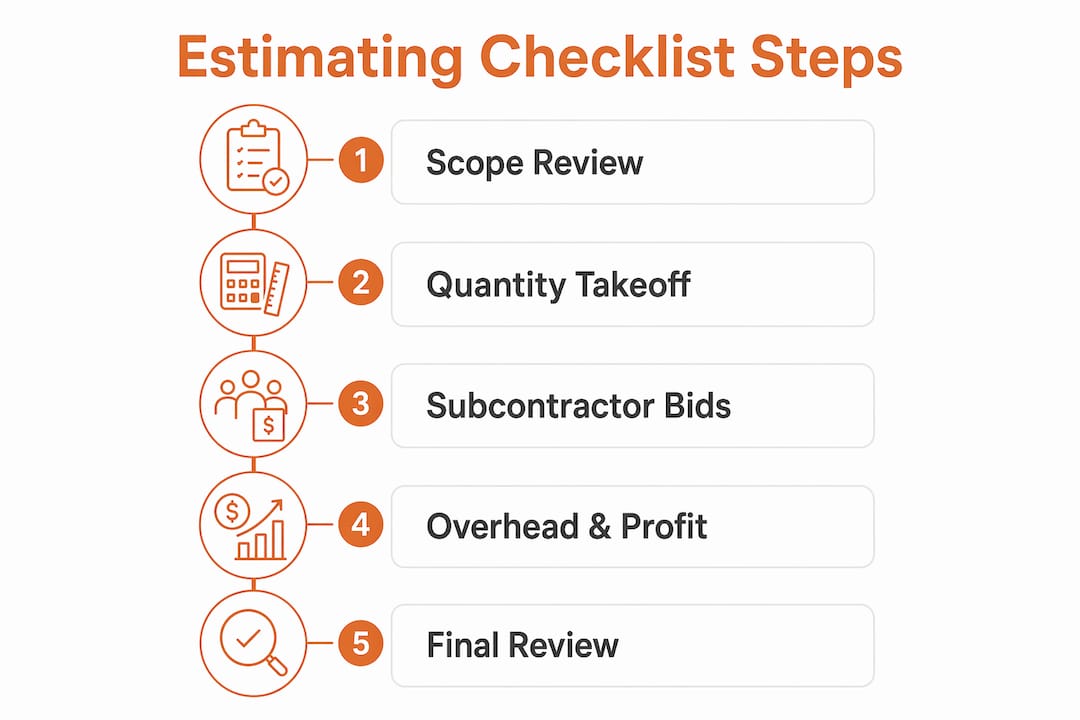
A construction estimating checklist is defined as a structured document that guides general contractors through every cost category and scope decision required to produce a reliable, profitable bid. Without one, small omissions snowball into margin-killing surprises on the job site. The industry standard term for this process is quantity surveying and cost estimation, though most contractors simply call it the estimating checklist. To build an estimating checklist for general contractor projects, you need to cover six core phases: scope review, quantity takeoff, labor pricing, subcontractor bid leveling, overhead and contingency calculation, and final bid validation. Each phase catches a different class of error, and skipping any one of them puts your profit at risk.
How to build an estimating checklist for general contractor projects
A well-built project cost estimation checklist starts with a clear scope review before any numbers are entered. Scope errors are the single most common cause of underbids, and they are almost always preventable. The checklist forces you to read every document before you price anything.

Lock down the bid documents first
Every bid package contains layers of information that affect cost. Your checklist must confirm you have reviewed drawings, specifications, addenda, and all owner-issued bulletins. Missing a single addendum can mean pricing work that has been deleted or, worse, omitting work that has been added.
Division 1 specifications deserve special attention. Division 1 requirements contain owner-mandated items like project scheduling software, specific insurance thresholds, temporary facilities, and commissioning requirements. These items add real cost to your overhead, and they are easy to miss when you jump straight to the technical divisions.
Build your scope review checklist around these steps:
- Confirm receipt of all addenda and log each one by date and number.
- Read Division 1 front-to-back before opening any other specification section.
- Create an inclusions log listing every item you are pricing.
- Create an exclusions log listing every item you are not pricing, with a written reason.
- Flag all items requiring a Request for Information before pricing begins.
- Resolve all RFIs in writing before submitting your bid.
Pro Tip: Never price an ambiguous scope item without a written clarification. A verbal answer from an architect or owner is not binding. Get it in writing, attach it to your bid, and reference it in your exclusions log.
How to conduct accurate quantity takeoffs and labor pricing
Quantity takeoff is the process of measuring every material and labor unit in the project from the drawings. It is the most time-intensive part of the estimating process, and it is where most cost errors originate.
Organize takeoffs by CSI division
The Construction Specifications Institute (CSI) MasterFormat divides construction work into numbered divisions. Organizing your takeoff by CSI division prevents double-counting and makes it easy to cross-check against subcontractor quotes later. Start with Division 3 (Concrete), move through Division 5 (Metals), Division 6 (Wood and Plastics), and continue in sequence through the finish trades.
Follow these steps for a reliable takeoff:
- Pull quantities directly from scaled drawings. Never estimate from memory or use rule-of-thumb quantities for a bid you intend to win.
- Use assembly-based pricing for repetitive scope. Assembly-based pricing groups related materials and labor into a single line item, which reduces errors and speeds up the takeoff compared to pricing each unit individually.
- Apply fully burdened labor rates. Base wages do not reflect true labor costs. Fully burdened rates include wages, payroll taxes, workers’ compensation, general liability, and benefits. Actual labor costs can exceed base wage rates by 30–50%, so using base wages alone will erode your margin before the project starts.
- Verify material quantities with a waste factor. Add 5–10% waste to cut materials like framing lumber, tile, and drywall depending on the complexity of the layout.
- Cross-reference your takeoff against the project schedule. Labor productivity changes with phasing. A crew working in a tight sequence costs more per unit than a crew with open access.
Pro Tip: Top firms are moving from instinctive pricing to data-driven benchmarks and assembly-based pricing. If you are still pricing from memory on commercial work, you are competing at a disadvantage against firms that have built historical cost databases.
You can also review estimating software insights to understand where digital tools complement your manual checklist rather than replace it.
What is the best way to solicit and level subcontractor bids?
Subcontractor costs typically represent 60–80% of a general contractor’s total bid on commercial projects. Getting this number wrong is the fastest way to lose money on a job you thought you won.
The goal of subcontractor bid leveling is to compare every quote against the same scope baseline. A low number from a sub is only valuable if it covers the same work as the higher quotes. Bid leveling uses a scope matrix to compare each subcontractor’s inclusions and exclusions line by line, catching gaps or duplicate scope before you commit to a number.
Build your subcontractor process around these practices:
- Solicit a minimum of three quotes per trade to establish a competitive range.
- Send each subcontractor the same scope document so all quotes start from the same baseline.
- Require written quotes with a clear list of inclusions and exclusions. Verbal quotes are not acceptable for a formal bid.
- Build a bid leveling matrix with trade scope items as rows and subcontractor names as columns. Mark each cell as included, excluded, or not applicable.
- Flag any quote that is more than 15% below the next lowest bid. An unusually low number almost always signals a scope gap, not a better price.
- Confirm that each sub has reviewed the applicable addenda before accepting their quote.
Written quotes also protect you during contract negotiations. If a subcontractor later claims a scope item was not included, your leveling matrix and their written quote are your defense.
How should you calculate overhead, profit, and contingency?
Overhead and profit are not the same thing, and treating them as interchangeable is one of the most common errors in general contractor estimating. Overhead covers your indirect costs: office rent, estimating staff, insurance, vehicles, and administrative expenses. Profit is your return for taking on project risk.
General contractors typically apply 10–20% for combined overhead and profit, adjusted for project size, risk, and market conditions. A straightforward residential remodel at the low end of your capacity might carry a 10% markup. A complex commercial project with tight scheduling, difficult site conditions, and a demanding owner warrants 20% or more.
Contingency is a separate line item that covers unforeseen conditions. AACE International guidance ties contingency to design maturity: 10–20% at schematic design, 5–10% at design development, and 3–7% at construction documents. Most general contractor bids fall at the construction documents stage, so a 5–10% contingency buffer is the standard range.
| Cost Category | Typical Range | Key Driver |
|---|---|---|
| Overhead | 8–15% | Fixed indirect costs |
| Profit | 5–10% | Project risk and complexity |
| Contingency | 3–10% | Design maturity and site conditions |
| Combined markup | 10–20% | Market conditions and capacity |
For a deeper look at how to calculate and document contingency, the construction contingency guide from Rconstructionsolutions breaks down the calculation by project type.
How do you review and finalize a construction estimate?
The final review is not a formality. Pre-submission checks reduce errors and protect profitability by catching arithmetic mistakes, scope gaps, and missing exclusions before the bid leaves your office.
Run through this checklist before every submission:
- Verify all arithmetic and formula references in your spreadsheet or estimating software.
- Confirm that every subcontractor quote used in the estimate matches the written quote on file.
- Check that your exclusions log is complete and attached to the bid package.
- Benchmark your total cost per square foot against similar completed projects. A number that is 20% above or below your historical range needs an explanation.
- Confirm the bid validity period. Standard estimate validity is typically 30 days, which protects you from material price changes and subcontractor availability shifts after submission.
- Review the bid package presentation. A clean, professional package with a clear cover letter, scope summary, and exclusion list builds owner confidence before the project starts.
Pro Tip: Ask a second estimator or project manager to review your bid before submission. A fresh set of eyes catches transposition errors and scope omissions that you become blind to after hours of working in the same spreadsheet.
For a broader look at improving your estimating process, Rconstructionsolutions has published practical guidance on workflow improvements that complement a solid checklist.
Key Takeaways
A disciplined construction estimating checklist covering scope review, quantity takeoff, labor rates, subcontractor leveling, and overhead calculation is the most reliable way to protect margin and win profitable work.
| Point | Details |
|---|---|
| Scope review comes first | Read Division 1 and all addenda before pricing to prevent costly omissions. |
| Use fully burdened labor rates | Base wages underestimate true labor costs by up to 50%; always include taxes, benefits, and insurance. |
| Level every subcontractor bid | A bid leveling matrix catches scope gaps that turn a low quote into a loss. |
| Calibrate overhead and contingency | Apply 10–20% for overhead and profit, and 3–10% contingency based on design maturity. |
| Validate before submission | Benchmark cost per square foot against past projects and confirm a 30-day validity period. |
Why process discipline matters more than the template itself
I have reviewed hundreds of estimates over the years, and the ones that fail rarely fail because of a bad spreadsheet. They fail because the estimator skipped a step under deadline pressure. A contractor racing to hit a bid due date will cut the scope review short, skip the bid leveling matrix, and apply a flat markup without thinking about project-specific risk. The template is fine. The discipline to follow it every time is what separates profitable contractors from ones who win work and lose money.
The contractors I see growing consistently, including firms scaling from $5 million to $50 million in revenue, share one habit: they treat the estimating checklist as a non-negotiable process, not a suggestion. They do not let a tight deadline justify a shortcut on the scope review. They do not accept verbal subcontractor quotes. They benchmark every bid against historical cost data before it goes out the door.
The other thing I have learned is that a checklist without ownership fails. Someone on your team needs to be accountable for every line item. When a bid goes wrong, you need to be able to trace the error back to a specific step and fix the process, not just the number. That kind of accountability only works when the checklist is written down, followed consistently, and reviewed after every project.
The 2026 best practices guide from Rconstructionsolutions covers how leading firms are building that accountability into their workflows right now.
— Rowena
How Rconstructionsolutions helps contractors build better estimates
General contractors who want to move from reactive bidding to a repeatable, profitable estimating process often need more than a template. They need a process built around their specific project types, crew structure, and market.

Rconstructionsolutions brings over 30 years of hands-on construction experience to help contractors build estimating workflows that hold up under real bid pressure. The team works directly with residential and commercial contractors to develop project cost estimation checklists, review existing bid processes, and identify where margin is being lost. Whether you are pricing your first commercial project or refining a process for a growing team, the construction consulting services at Rconstructionsolutions are built to deliver measurable results, not generic advice. Reach out to discuss what a structured estimating process can do for your bottom line.
FAQ
What is a construction estimating checklist?
A construction estimating checklist is a structured list of steps and cost categories a general contractor follows to produce a complete, accurate project bid. It covers scope review, quantity takeoff, labor pricing, subcontractor leveling, overhead, and final validation.
How do I calculate overhead and profit for a general contractor bid?
General contractors typically apply 10–20% for combined overhead and profit, adjusted for project complexity and risk. Overhead covers indirect costs like office and insurance; profit is your return for managing project risk.
What is bid leveling and why does it matter?
Bid leveling is the process of comparing subcontractor quotes against a common scope matrix to identify inclusions, exclusions, and gaps. It prevents you from using a low quote that does not actually cover the full scope of work.
How much contingency should I include in a construction estimate?
AACE International recommends 3–7% contingency at the construction documents stage, 5–10% at design development, and 10–20% at schematic design. Match your contingency to the maturity of the project documents.
How long is a construction estimate valid?
Standard estimate validity is typically 30 days. This protects you from material price increases and subcontractor availability changes after you submit your bid.